Guide to Seasoning Your Canvas Tent

Canvas tents are made from Australian cotton canvas, a natural, durable material that’s more breathable than nylon. This ensures proper ventilation when sleeping and keeps humidity levels inside low to prevent condensation and mould forming.
Canvas tents are great for all different kinds of weather, they remain cooler for longer in hot weather and are a good insulator in cold weather.
However, even though canvas is a water-resistant material, a new canvas tent is not fully waterproof. Therefore you need to season your canvas tent to stay dry during rainy camping days.
Don’t worry, if you’e not sure how to do it, we have prepared an easy and thorough guide that will make seasoning a canvas tent a piece of cake!
Why do you need to season your canvas tent?
Seasoning (aka weathering) a canvas tent is an important process to ensure it’s water-tight. Since the tent panels are sewn together, and the holes are larger than the thread, there are hundreds of tiny holes that can let in water.
However, by soaking the tent in water, you enable the canvas and thread to expand and contract, filling in the holes and reducing leaking. Of course, after soaking, you need to let the tent fully dry to complete the seasoning process.
You should season your canvas tent after you buy it and once every 12 months to ensure longevity.
How to season your canvas tent
Seasoning a canvas tent isn’t particularly hard but there are a few steps you need to follow to do it right.
Step 1. Find a suitable location
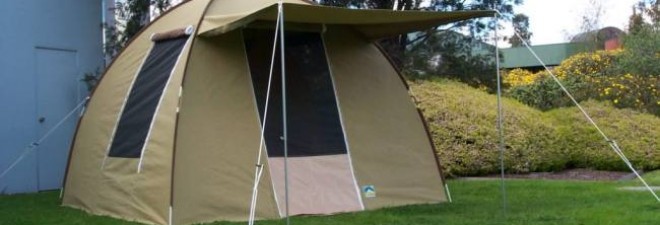
A sunny, dry morning is the best time to start seasoning your tent. Set it up in a suitable location in your backyard where no one is likely to crash into the tent and make it necessary to repeat the soaking and drying process again. Zip up the wall windows and close any doors or other openings. Make sure it’s stretched out and as tight as possible.
Step 2. Use a long hose or sprinkler
Use a long hose to spray water on the tent to saturate it thoroughly or set up a sprinkler to emulate rainfall (you may need to move it around). Pay particular attention to wetting the seams. When it’s completely waterlogged, walk away and leave it to dry in the sun.
Step 3. Let it dry
Once it’s dry and hot to touch, repeat the process, adjusting the tent if needed to make sure that’s it’s stretched out as much as possible. On the second wetting the canvas will pull tight against itself and the threads will swell filling in the holes. Leave it to dry again, and repeat the process a final time.
Step 4. Pack it up
When your tent is 100% dry inside and out, it’s fully waterproofed and ready for camping. All you need to do is pack it all up and leave it in storage until your next campsite adventure to Byron Bay!


This Post Has 0 Comments