


The 5-Point Caravan Check That Prevents 90% of Holiday Disasters

Before you hit the road to Byron Bay, this isn’t just another checklist. This is your insurance policy against a roadside nightmare.
It’s a scene I’ve watched play out more times than I can count. A caravan finally pulls into Broken Head Holiday Park, hours after they were expected. The sun has already set, the kids are cranky in the back, and you can feel the tension between the parents before they even open their car doors. Instead of the joyful relief of arrival, their first hour is a flurry of hushed, frustrated arguments, phone calls to roadside assistance, and the grim realisation that their holiday has started with a costly, stressful problem.
More often than not, the culprit is something small. A cracked water hose. A flat battery. A tyre that was fine for short trips but couldn’t handle the highway. It’s a simple, 10-minute check at home that snowballed into a 4-hour ordeal on the side of the Pacific Highway.
After helping hundreds of caravanning families settle in, you start to see the patterns. You see what separates a smooth, triumphant arrival from a trip-ruining disaster. It’s not about having the fanciest rig or the most gear. It’s about knowing what actually goes wrong.
Forget those overwhelming 50-point checklists that make you feel like you’re recommissioning a spaceship. We’re cutting through the noise. This is a strategic guide to the five most critical systems that, if neglected, are statistically most likely to derail your well-deserved break. This is how you avoid the mistakes that ruin trips.
1. The Roadside Despair-Stopper: A Proper Tyre Inspection
The Common Problem: A highway blowout. It’s the number one cause of caravanning holidays ending prematurely on the back of a tow truck. People check their car tyres religiously but often give the caravan’s a quick kick and hope for the best. This is a gamble you will eventually lose. A blowout doesn’t just mean a flat tyre; it can cause catastrophic damage to the underside of your van, shredding plumbing, wiring, and wall panels, costing thousands to repair.
The Real-World Consequence: You’re stranded on a narrow shoulder with cars whizzing past at 110 km/h. Your holiday timeline is shattered. You’re trying to find a mobile tyre service on a Sunday, paying emergency call-out fees, and losing an entire day of relaxation and exploration you’d been planning for months.
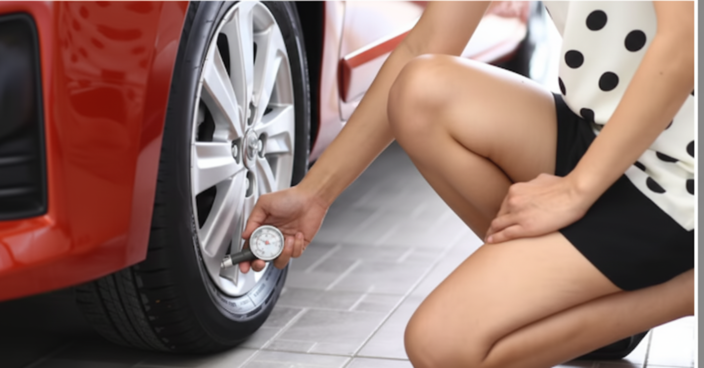
The Proven Solution (The 3-Point Tyre Check):
- Pressure (When Cold): Before you’ve even moved the van an inch, check the pressures. The correct PSI is written on the caravan’s VIN plate or the tyre sidewall itself. Under-inflation is the leading cause of blowouts as it causes the sidewalls to flex and overheat.
- Tread Depth: Grab a 20-cent coin and stick it into the tread grooves. If the tread doesn’t reach the platypus’s bill, your tyres are likely below the legal and safe limit.
- Sidewall Health: This is the one most people miss. Get down and look closely at the sides of your tyres (both inner and outer walls). Look for tiny cracks, crazing, or bulges. Caravan tyres often perish from sun exposure and age long before the tread wears out. This is a ticking time bomb.
???? Mistake Prevention: Checking tyre pressure after you’ve loaded the van. Your van’s weight changes significantly when loaded with water, gas, food, and gear. Always check your pressures when the van is fully loaded and cold, right before you leave. This ensures you’re running the correct pressure for your actual travel weight, not the empty weight.
2. The First-Night Ruiner: Gas & 12V Electrical Systems

The Common Problem: You’ve perfectly reversed onto your site, you’re ready for that celebratory cold beer, and you open the fridge to find it’s warm. The lights won’t turn on. Your water pump is dead. A tiny bit of corrosion on a battery terminal or an empty gas bottle has just soured the triumphant moment of arrival.
The Real-World Consequence: Your food for the first few days is at risk of spoiling. You’re eating takeaway instead of the camp meal you planned. The kids can’t charge their devices, and you’re fumbling around in the dark with phone torches, trying to diagnose a problem when you should be relaxing under the stars.
The Proven Solution (The Driveway Power-Up):
- The Gas Leak Test: Open your gas bottle valves. Mix a bit of dish soap with water in a spray bottle and spray it on all the connections, regulators, and fittings. If you see bubbles forming, you have a leak. Shut it down immediately and get it fixed. It takes 60 seconds and could prevent a fire.
- The Appliance Check: While still at home, turn on your 3-way fridge and make sure it gets cold on all power sources (240v, 12v, and Gas). You’d be amazed how many people discover their fridge only works on mains power when they’re already at a national park.
- The 12V Lifeblood Check: Turn on every 12v item—lights, water pump, fans—to ensure they work. Check your battery monitor to see its state of charge. If it’s not holding charge, you need to know now, not when you’re off-grid.
???? Mistake Prevention: Assuming your gas bottle is ‘probably full enough’. Gas gauges are notoriously unreliable. The simple fix is the hot water trick. Pour a cup of hot water down the side of the gas bottle. A condensation line will form at the level of the liquid gas inside, showing you exactly how much you have left. No more guesswork.
3. The Hidden Nasty: Your Water System
The Common Problem: You arrive, hook up your hose, and the first cup of tea you make tastes stale, plasticky, and just plain wrong. Or worse, you fill your tanks at home only to arrive at your site and find most of it has leaked out through a perished hose you never noticed.
The Real-World Consequence: You’re forced to buy bottled water for your entire trip, which is costly and bad for the environment. Or you discover the foul taste is from algae and bacteria that have been breeding in your tanks and lines, which is a health risk. A slow leak can also go unnoticed, causing rot and delamination in your van’s floor and walls—a silent, expensive destroyer.
The Proven Solution (The Flush & Inspect):
- Sanitise Your Tanks: If your van has been sitting, don’t just fill it up. Flush the system with a dedicated caravan tank sanitising solution (available at any camping store). It will kill any nasties and get rid of that “stored water” taste. Run it through every tap (hot and cold).
- Inspect Every Hose: Your freshwater inlet hose is your lifeline. Check it for cracks, especially near the fittings where it bends most. Do the same for every other visible water line under the van. These hoses are cheap to replace at home but a massive headache to find in a small coastal town.
- Test the Pump & Taps: Fill your tanks with some water and run the pump. Check every tap and fitting inside the van for drips or leaks. Listen to the pump—does it cycle on and off when all taps are closed? If so, you have a slow leak somewhere in the system.
???? Mistake Prevention: Forgetting the humble water inlet hose. People spend thousands on their van but connect it to the tap with a cheap, sun-baked green garden hose. Invest in a dedicated, food-grade drinking water hose and check it for brittleness before every single trip. A split inlet hose can flood your site and ruin your relationship with your neighbours before you’ve even said hello.
4. The Unthinkable Failure: Tow Hitch & Electrics
The Common Problem: The “it’ll be right” approach to the most critical connection point on your entire rig. People assume that because it worked last time, the hitch, chains, and brake lights will work this time. Wear and tear is gradual, and failure is often sudden and total.
The Real-World Consequence: This is the nightmare scenario. A coupling failure on the highway is a life-threatening event. Less dramatic but still serious are non-functioning brake or indicator lights, making you a massive hazard to other drivers and earning you a hefty fine and demerit points if you’re pulled over.
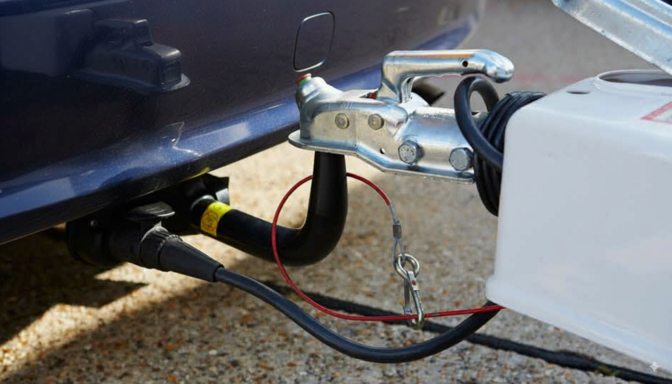
The Proven Solution (The 2-Person Safety Dance):
- Visual & Physical Inspection: Look for cracks or excessive wear on the tow ball and inside the coupling. Grease the moving parts of the coupling mechanism so it operates smoothly and doesn’t bind. Check your safety chains for wear on the links and ensure the D-shackles are rated and secure.
- The Light Check: This is a two-person job. Hitch up the van and connect the electrics. Have one person stand at the back of the van while the other cycles through every light from the driver’s seat: running lights, left indicator, right indicator, and—most importantly—the brake lights.
- Breakaway Cable: Ensure your breakaway cable is in good condition (not frayed) and correctly attached. This is your last line of defence.
???? Mistake Prevention: The “silent solo check.” One person trying to check the brake lights by themselves by putting a brick on the pedal and walking to the back. Don’t do it. You can’t see intermittent faults or weak connections. Make it a non-negotiable pre-trip ritual with your partner or a neighbour. It takes two minutes and confirms your most important safety system is working perfectly.
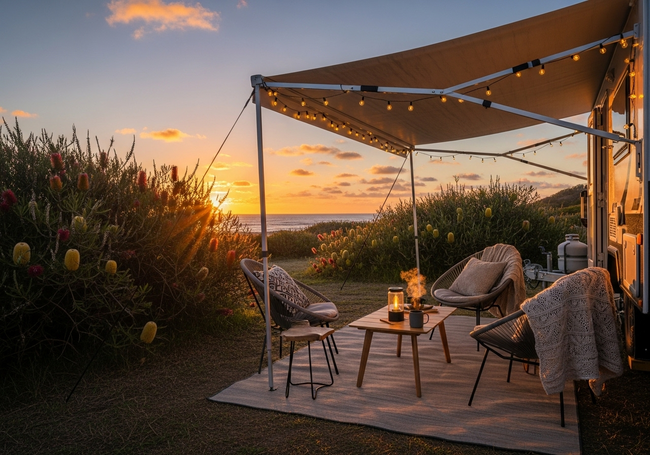
5. The Outdoor Living Letdown: The Awning
The Common Problem: You pull into your perfect, sun-drenched site, ready to create your beautiful outdoor living space. You unroll the awning for the first time in six months only to be hit by the smell of mildew and discover a constellation of black mould spots, or worse, a rip from a branch you forgot about last trip.
The Real-World Consequence: Your prized outdoor space is unusable. You’re either stuck inside the van, or you spend the first afternoon of your holiday trying to scrub mould and patch rips with gaffer tape, all while enviously watching your neighbours relaxing under their pristine awnings.
The Proven Solution (The Driveway Dress Rehearsal):
- Full Deployment: At home, on a dry day, roll your awning out completely. Let it air out. This is the only way to spot problems.
- Inspect & Clean: Look at the fabric closely for any signs of mould, mildew, or small tears, especially along the seams. A mild solution of vinegar and water can treat small mould spots. Check that the mechanism is smooth and the arms aren’t bent.
- Lubricate: A quick spray of silicone lubricant on the moving joints and tracks of the awning arms will ensure it operates smoothly and doesn’t seize up from lack of use.
???? Mistake Prevention: Packing away a damp awning. Even a little bit of moisture from morning dew, packed away in the dark, is enough to turn your beautiful awning into a mouldy mess over a few weeks. The golden rule: if there is any doubt, roll it out again to dry completely as soon as you get home. This 20-minute task will save you hours of scrubbing and potential replacement costs.
Your Journey Starts Now
These checks aren’t chores; they are the first, most important part of your holiday. They are the deliberate act of trading a few minutes of work in your driveway for hours of stress-free travel on the road.
As you perform these final checks before setting off on your travels, take a moment. You’re not just preparing a vehicle; you’re preparing for a peaceful arrival in a very special place. You are getting ready to journey through Bundjalung country, a land cared for by the Arakwal people for generations. This preparation is an act of respect for your family, for other road users, and for the journey itself.
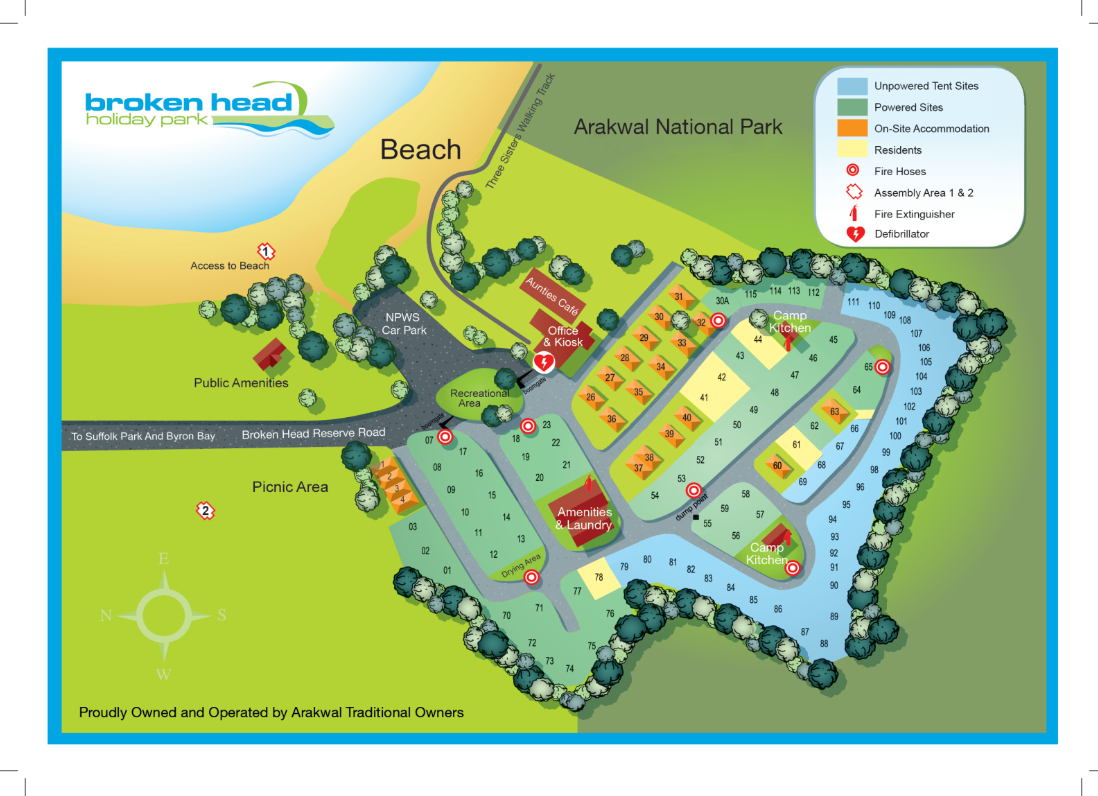
At Broken Head Holiday Park, we see ourselves as your expert partner for the perfect caravanning holiday, and that partnership starts before you even leave your driveway. Because we know that a truly great holiday begins with a worry-free journey.
Complete these checks, and you can hit the open road with the quiet confidence that you’ve eliminated the most common holiday-ruiners. We’ll see you when you get here, relaxed and ready to begin your Byron Bay adventure from the moment you arrive.


This Post Has 0 Comments